How to Measure Kitchen Countertops for a Replacement Quote

- Why measure before calling for a quote
- What you need (it's almost nothing)
- Step 1 — Sketch the kitchen first
- Step 2 — Measure each counter run
- Step 3 — Mark every cutout
- Step 4 — Capture overhangs
- Step 5 — Backsplash height
- Step 6 — Photos, lots of photos
- Common mistakes to avoid
- When templating takes over
- FAQs
Measuring a kitchen counter sounds straightforward until the tape goes back in the drawer and the numbers on the page do not add up. Walls are not square. Cabinets sit slightly off level. Sinks land closer to one edge than the other. Most homeowners get most of the layout right, but small mistakes get expensive once a slab is being cut.
This guide is the same checklist the JR Stone team walks clients through when they call for a phone quote. It covers what to bring, how to sketch, how to handle the awkward parts (sinks, overhangs, out-of-square walls), and where to stop because professional templating takes over from there.
Why measure before calling for a quote
Two reasons. The first is budget clarity. A fabricator can give a tight estimate over the phone or email if they have square footage, the material a homeowner is leaning toward, and a sense of cutout count. Without those three, the quote is a wide range — useful for a gut check, less useful for actually planning a project.
The second reason is the remnant yard. Remnant pieces are irregular, so vanity, bar top, and small island projects move faster when staff can match an in-stock piece to specific dimensions. Walking in with a rough sketch and measurements turns a long inventory hunt into a five-minute conversation.
What you need (it's almost nothing)
The full kit
- 25-foot tape measure (long enough to span any kitchen run in one pull)
- Sharpened pencil — pen ink smudges, pencil erases
- Graph paper or any notepad
- Phone camera
- Optional: laser distance meter for very long walls
That is the entire toolkit. No CAD software, no fancy diagram. A homeowner who can sketch a rough overhead view of the kitchen and write numbers on it has everything a fabricator needs for an honest quote.
Step 1 — Sketch the kitchen first
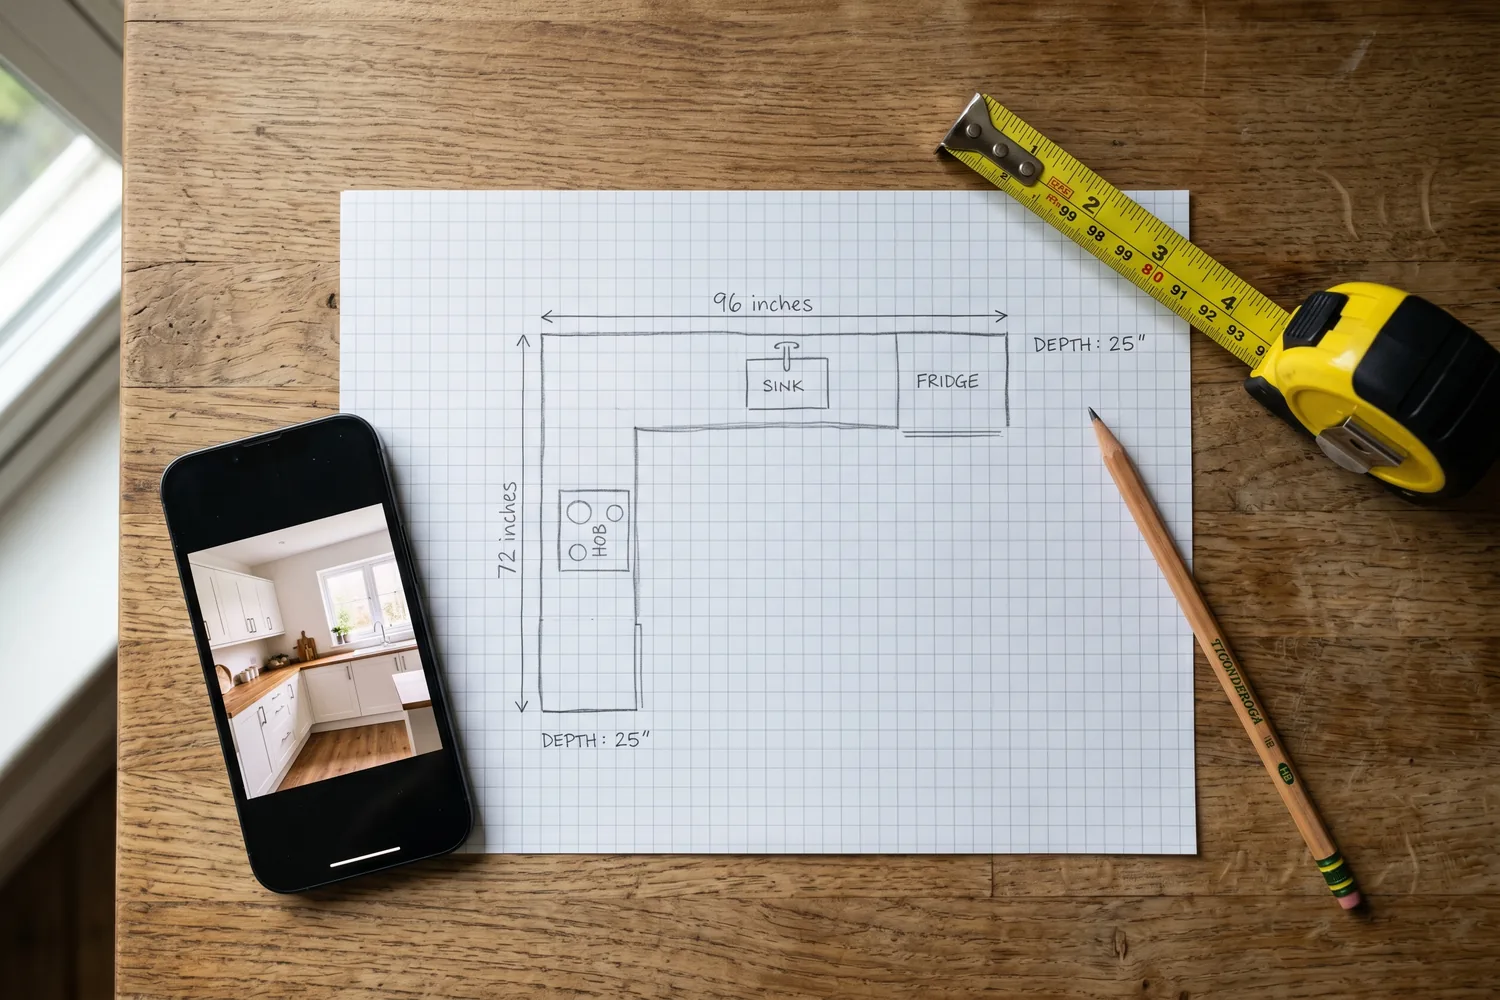
Pick up the pencil before picking up the tape. Sketch a rough overhead view of every counter surface in the kitchen — the long run, the L, the island, the peninsula, anything that needs stone on top. The drawing does not need to be to scale or beautiful. It just needs to be a recognizable map of the kitchen.
Label each counter run with a letter: A for the back wall run, B for the perpendicular leg, C for the island, and so on. The labels make it easy to write measurements on the sketch without confusion when there are four or five separate pieces. Add an arrow pointing to the sink, the cooktop, and any seating overhang so the layout is clear at a glance.
Step 2 — Measure each counter run
For every counter labeled on the sketch, capture two numbers: length and depth.
Length
Run the tape from one end of the counter to the other along the back wall (or the front edge if there is no back wall, like an island). Pull the tape tight and read at the far end. Write the number on the sketch next to that run. Inches, not feet. A 96-inch counter is easier to math out than 8 feet 0 inches when totaling square footage later.
Depth
Standard counter depth is 25 to 26 inches measured from the wall to the front edge of the existing countertop. Confirm by measuring at three points along each run: left, middle, right. If all three numbers match, the counter is square to the wall. If they vary by more than half an inch, the wall is out of square (which is normal in older homes) — note all three numbers.
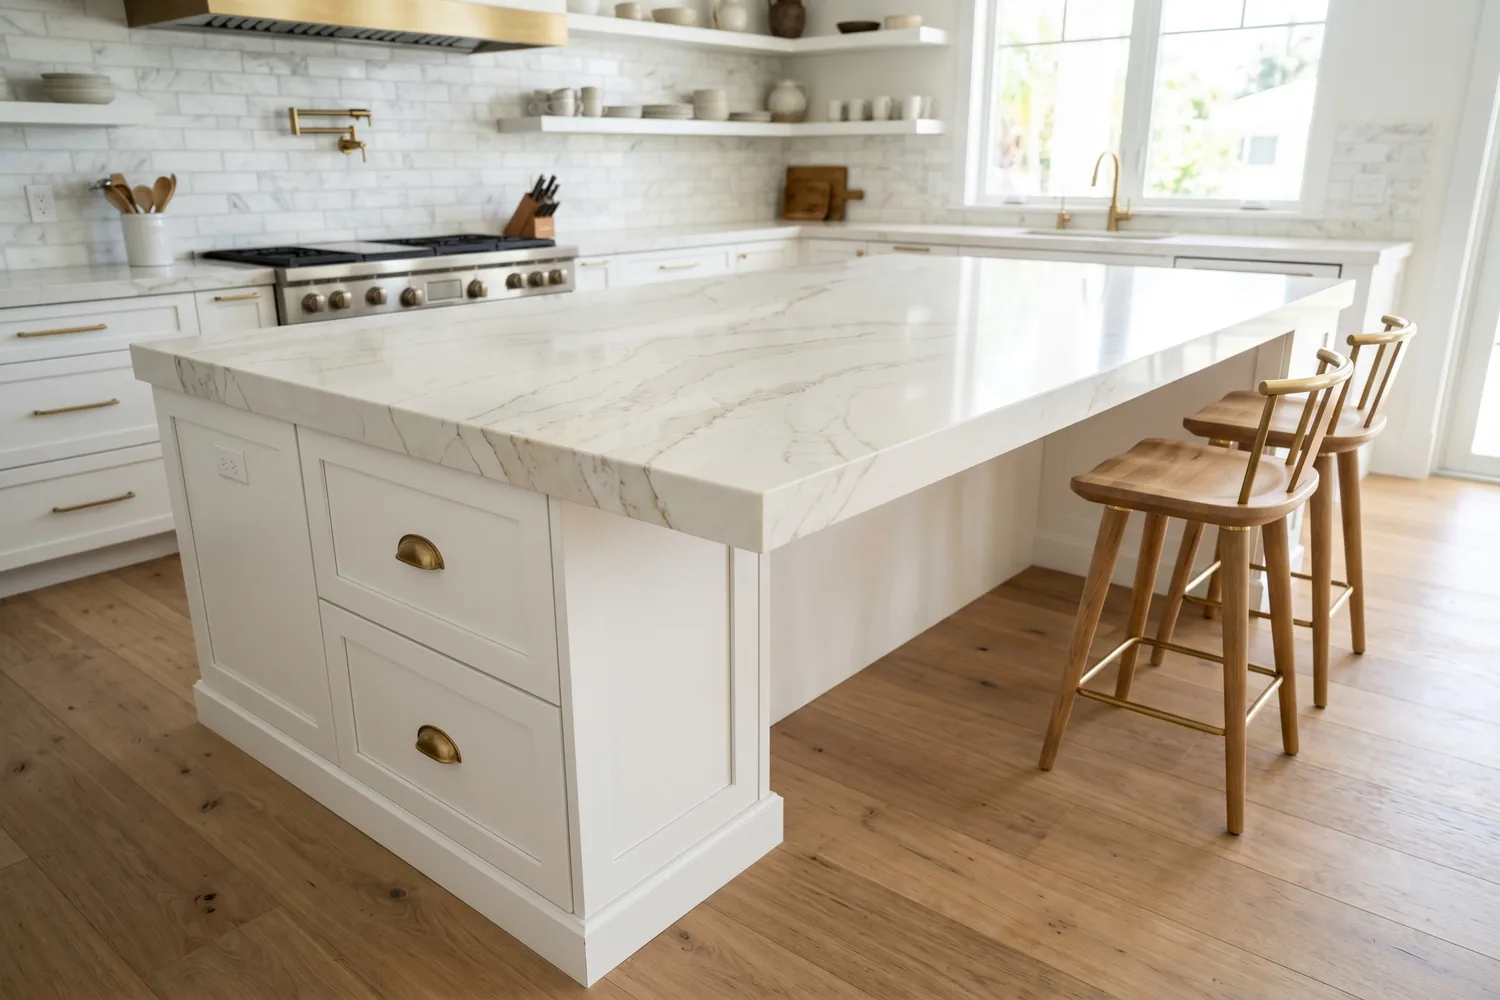
Islands and peninsulas: Measure both length and width separately because there is no back wall. Islands are often 36 to 42 inches deep with seating on one side. Capture the dimensions of the cabinet base, then add the overhang in step 4.
Step 3 — Mark every cutout
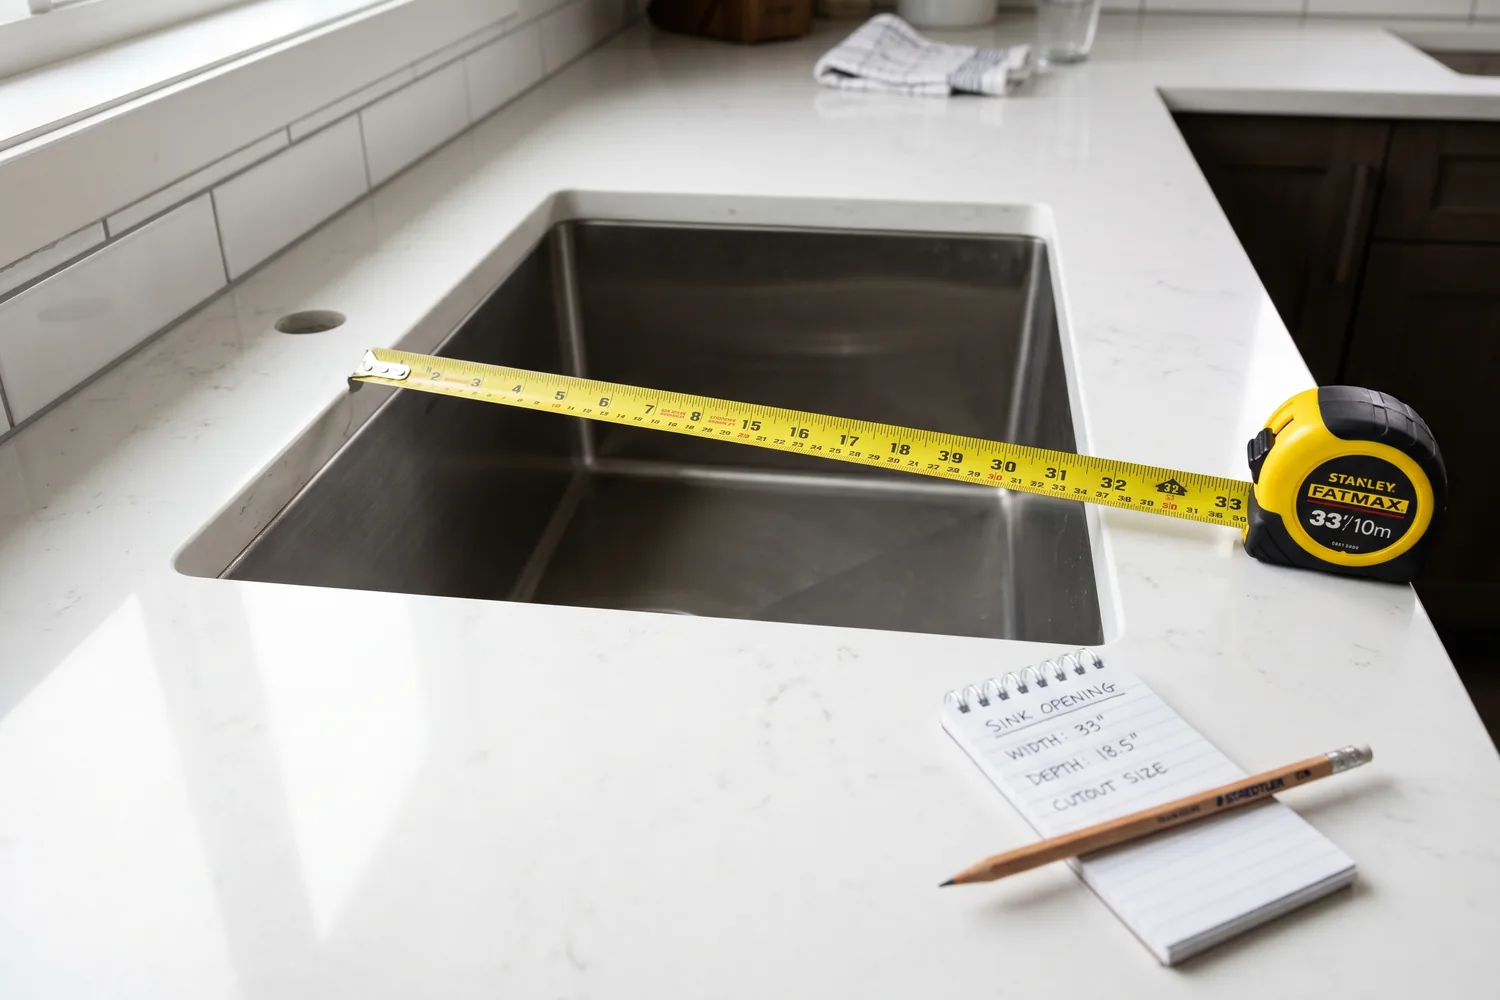
Every cutout the new countertop needs — sink, cooktop, faucet holes, soap dispenser — gets marked on the sketch. For each cutout, capture three things:
- Distance from the nearest counter edge to the center of the cutout. Measure from the front edge of the counter to the front edge of the sink, then from the side edge to the side edge of the sink. Two numbers per cutout.
- The cutout's own width and depth. A typical undermount kitchen sink runs 30 to 33 inches wide by 18 to 19 inches deep. The cutout itself is usually 1/4 inch smaller on each side to provide a sealing lip. If installing a new sink, bring the spec sheet.
- Faucet hole count and spacing. One hole, three holes, or four (faucet plus side sprayer plus soap dispenser plus air gap). Note the spacing so the fabricator drills the right pattern.
Cooktops follow the same pattern. The cutout dimensions come from the cooktop manufacturer's spec sheet, never the existing countertop hole — old cutouts are sometimes sloppy and were sized for a different model.
Step 4 — Capture overhangs
Overhang is how far the counter extends past the cabinet face. Three places to check:
- Front edge of standard counter runs. Almost always 1.5 inches. Measure to confirm.
- Sides of standard counter runs. Usually 1 inch where a counter ends at an open edge (not against a wall).
- Seating overhang. If barstools tuck under an island or peninsula, the seating overhang is usually 12 inches. Anything past 14 inches needs corbels or steel support brackets to prevent cracking, especially with quartzite or natural stone.
Measure overhang from the cabinet face to the front edge of the counter, not from the wall. Easy to confuse the two on islands.
Step 5 — Backsplash height
Two scenarios here, and they need different approaches.
Standard 4-inch backsplash
If the new project includes a 4-inch stone backsplash (a low strip running along the back of the counter), there is nothing extra to measure. The fabricator cuts the backsplash to match the counter length, and the height is uniform 4 inches.
Full-height stone backsplash
For a full slab going from the counter up to the underside of the upper cabinets, measure the wall height at every wall section. Cabinets are rarely perfectly level, so the height usually varies by a half-inch or more between left and right ends of the same run. Measure both ends plus the middle of each wall, and label each measurement on the sketch.
Worth deciding now: full backsplash versus 4-inch backsplash is one of the bigger style choices on a stone countertop project, and it changes both the budget and the wall prep.
Step 6 — Photos, lots of photos
Photos catch what measurements miss. For every counter run, shoot:
- One straight-on shot from a few feet back showing the whole run
- One photo at each end of the run
- One close-up of every cutout
- One overall kitchen shot for context
- Photos of any unusual conditions: angled walls, plumbing under the sink, electrical outlets in the backsplash zone, walls that are clearly out of square
Send the sketch and the photos together. A fabricator looking at both can confirm the layout matches the measurements, spot anything missed, and quote with confidence.
Common mistakes to avoid
The mistakes that come up most often when clients send measurements:
- Measuring the existing countertop instead of the cabinets. An old laminate counter sometimes overhangs more than a new stone counter will. Measure the cabinet box if possible, then add overhang separately.
- Forgetting to measure depth in three places. An out-of-square wall throws off the entire layout. Capture the variance now, not on template day.
- Using feet instead of inches. Fabricators work in inches. "8 feet 6 inches" turns into "102 inches" anyway — do the math once.
- Skipping the sketch. A list of bare numbers without a drawing forces the fabricator to ask three follow-up questions before quoting.
- Mismatched units across the same job. Some homeowners measure inches on one run and feet-and-inches on another. Pick one unit and stay there.
- Assuming standard depth. Most kitchens are 25 inches deep. A few older homes are 24, and custom kitchens can run 26 to 27. Measure, do not assume.
When templating takes over
Homeowner measurements are for budget quotes. Final fabrication is cut from a digital template captured on site by the fabricator after the old countertop is removed. The template uses a laser to capture every wall, corner, and cabinet edge to within 1/16 of an inch, accounting for out-of-square walls and uneven cabinet runs that hand measurement misses.
So what is the point of measuring at home? Three things:
- A budget quote that is close to final pricing.
- Picking material with a real sense of cost (quartz at 50 sf is wildly different in budget from quartzite at 50 sf).
- Walking the remnant yard or showroom with the project size already in hand.
For Palm Beach County homeowners, the JR Stone team includes free in-home templating with every project. Send the sketch and photos for a phone quote, then schedule the in-home consultation when the project is ready to move forward.
Quick reference: length + depth of every run, location and size of every cutout, overhang dimensions, backsplash height (if full slab), photos of everything. That is the whole package.
Frequently asked questions
Do I need to measure my countertops to get a quote?
Not always. Most fabricators provide a free in-home consultation that includes professional templating with a digital laser, which is more accurate than any homeowner measurement. But a homeowner sketch with rough measurements is useful for a phone or email quote, for budget planning before committing to a full consultation, and for ordering remnants from a yard for smaller projects like vanities.
What tools do I need to measure my countertops?
A 25-foot tape measure (long enough to span any kitchen run in one shot), a sharpened pencil, graph paper or any notepad, and a phone camera. That is the entire kit. A laser distance meter helps for very long walls but is not required.
How accurate do my measurements need to be?
For a budget quote, measurements within an inch are fine. Square footage and material choice drive most of the price, and a fabricator can absorb small differences. For final pricing and fabrication, professional templating replaces homeowner measurements anyway. The point of measuring at home is to get a workable estimate, not to skip the template.
What is templating and how does it differ from measuring?
Templating is a digital laser scan of the existing cabinets after the old countertop is removed. The fabricator captures every dimension, angle, and irregularity to within 1/16 of an inch. Templating is what fabrication is cut from. Homeowner measurements are for budget quotes only; they are never used for the actual cut.
How do I measure for a backsplash?
Measure from the top of the counter surface (or the top of the existing backsplash) up to the underside of the upper cabinets at every wall section. The height usually varies by 1/2 inch or more between walls because cabinets are rarely perfectly level. Measure each section separately and write each measurement on the sketch.
What measurements does a fabricator need for an accurate quote?
Length and depth of each counter run, location and size of all cutouts (sink, cooktop, faucet), overhang dimensions on islands and peninsulas, and backsplash height if applicable. A rough sketch with these numbers labeled, plus a few photos of the kitchen, gives a fabricator everything needed for a firm budget quote.
How do I calculate square footage from my measurements?
Multiply length by depth in inches for each counter run, then divide by 144 to convert to square feet. Add up every run. A typical 10 by 10 kitchen runs 40 to 50 square feet of countertop. Add 10 to 15 percent for waste and overhang. Most fabricators bill per square foot of finished countertop, which is usually slightly less than the total slab purchased due to seam placement.
Should I measure before or after demo?
Either works for a budget quote. Measuring before demo (with the existing countertop in place) is easier because the surface is intact. Measuring after demo (cabinet boxes exposed) gets you closer to the final dimensions because countertops sometimes overhang slightly past cabinets. For final templating, the fabricator always works with bare cabinets after demo.
Do you need to measure for a remnant piece?
Yes — remnants are irregular shapes, so coming with measurements means staff can match an existing piece in the yard to the project in minutes. Bring the dimensions of the vanity, bar top, or small island, plus a sketch and a few phone photos, and any cutout details for the sink or faucet. More on the JR Stone remnant yard here.
Related reads: Full backsplash vs 4-inch — how to decide · Edge profiles compared · Quartz vs quartzite vs marble vs granite